Monday & Tuesday
Dinosaur Stories: “Patrick’s Dinosaurs” by Carol Carrick
What am I teaching?
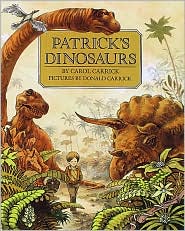 To start your month you will be introducing your learner(s) to the world of dinosaurs through the story, “Patrick’s Dinosaurs.” “Patrick’s Dinosaurs” is a magical story where a little boy named Patrick imagines that there are dinosaurs around him as he goes through his day with his big brother Hank. This story is the perfect way to get students excited about the Dinosaur theme and teaches children small details about the dinosaurs in the story.
You will introduce children to new vocabulary words at the beginning of the week and revisit them throughout the week. This will give your learner(s) the opportunity to potentially begin remembering some of the vocabulary words by sight by the end of the week. The vocabulary words are a way to expose your students to a variety of print as well as provide teaching opportunities for letter recognition. Your vocabulary lessons should be primarily Discussion Based and Activity Based with a lesson easily involving the creation of the vocabulary cards themselves!
These are your vocabulary words for this week:
- dinosuar
- zoo
- jaws
- walnut
Your child(ren) will also be expected to practice their sequencing skills using pictures from the story. Sequencing lessons provide the perfect opportunity for you to meet some of your learning goals with your learner(s). Sequencing lessons should be primarily Discussion Based and Activity Based.
The following lesson elements are to be focused on for the week. By the end of the week your learner(s) should:
- Be familiar with the vocabulary words associated with the story.
- Be familiar with the definition of an “author” and “illustrator” as well as the author and illustrator of “Patrick’s Dinosaurs.”
- Be starting to make predictions about the story and participating in question and answer sessions regarding elements of the story.
How will I teach this week?
Before starting your lessons transform your classroom into a dinosaur reading paradise. Create nooks and crannies in your room that invite children to further their love of reading. Place items around the room from this week’s story (i.e. pictures of the book, pictures of dinosaurs from the book, picture of Patrick and his brother Hank, etc.) to further learner(s) comprehension and understanding of the story. By creating an intriguing and comfortable learning environment you will have more success achieving your learning goals.
Lessons for this week should be primarily Discussion Based and Activity Based as mentioned above. Make your lessons fun and engaging by creating games and movement opportunities through which your children will learn. Discussions need not last long, but can merely introduce your student to the exciting lesson they are about to begin.
By the end of the week your students should have a basic understanding of the lesson elements as well as have been exposed to multiple Alphabet Opportunities.
Which learning goals do I need to incorporate?
The following are learning goals that you should be aware of in every lesson you teach this week. Creatively incorporate them into your lessons and your child(ren) will not even realize they are learning! Below you will find the learning goal in “bold” with a brief description of how to work it into your lesson.
Reading Comprehension:
Use predictions and context to make predictions about story content:
This learning goal can be addressed throughout the month on almost a daily basis. Instead of creating an entire lesson around this learning goal, instead work it into each and every lesson simply by asking questions of children while you read (i.e. “What do you think will happen next?”). It won’t take long for children to start making well thought out predictions. The more frequently you practice this skill with your child the better “little predictors” you will have!
Ask and answer questions about essential elements of a text:
This is yet another learning goal that can be addressed with children on a daily basis. Since you are reading the same story both days, by the end of the week your learner should be able to answer almost any question concerning the story they have been reading. Questions can be simple in nature, such as, “What was the name of Patrick’s brother?” (Patrick’s Dinosaurs) Or you may choose to ask questions that require some thought, such as, “What was the professor doing when he found the dinosaur bone?” (Big Old Bones). Whatever questions you choose to use, make sure that they are appropriately challenging for each child you teach.
Letters:
Recognition, Sounds and Writing
Providing learning opportunities for letters is an essential component of teaching Blue Lessons. Children should be practicing their letter recognition skills and sounds on a daily basis through some consistent method (i.e. flash cards) and have the opportunity to write letters several times a week. These skills need not always be taught through a formal lesson. Letter writing and practicing letters with flashcards are great activities for your child once lessons have reached completion and your child has entered Choice Time. Letters can also be integrated into practically every lesson taught simply by briefly calling attention to letters throughout the reading of a story, or allowing them the opportunity to write a letter or word on a project.
I’m stuck. Suggestions please!
Week 1: GETTING STARTED
- Materials Needed: Soundscapes of the Dinosaurs CD
- Having trouble getting started? Play your Soundscapes of the Dinosaurs CD and crank the volume up to set the Jurassic atmosphere! You can draw attention to the sounds of the CD by asking your child what he/she hears with open-ended questions. This will help draw your child into the world of the dinosaurs allowing you to easily segue into your lesson of the day!
Week 1 Lesson Suggestion: DINO ALPHABET FLASH CARDS
- Materials Needed: child-safe scissors, glue, card stock, small printouts of 5 dinosaurs (3x3) with differing 1st letter sounds (ie, Tyrannosaurus, Stegosaurus, Diplodocus, etc.)
- Dinosaur related story (suggested book: Patrick’s Dinosaurs)
PART 1: Begin by reading your chosen dinosaur book with your child. As you read, be sure to ask your child open-ended questions about the story (“What do you think will happen next?”). Having your child make predictions about the story will help to increase your child’s reading comprehension skills as well as help your child retain information of the story!
PART 2: Using the materials listed, create 5 unique Dinosaur Flash Cards with your child! Allow your child the opportunity for fine motor practice by having him/her cut out each dinosaur on his/her own and glue the dinosaur cut out onto a piece of cardstock . Leave enough space underneath the pasted dinosaur to write “T is for T-Rex!”, “S is for Stegosaurus!”, and so forth under each dinosaur. Be sure to BOLD print the first letter sound of each dino’s name so that it stands out a bit more from the rest of the dinosaur’s name! Once completed, the flash cards are a great way to practice alphabet sounds and get your child into “dino mode” throughout the rest of the month!
Wednesday & Thursday
Creating a Jurassic Park: Where and When did the Dinosaurs Live?
What am I teaching?

To start your month you will be introducing children to the amazing, prehistoric world that dinosaurs lived in. This includes teaching about the Mesozoic Era as well as introducing your children to the concept of a timeline so that they will start to understand just how long ago 65 million years is! During week 1 you will begin transforming your home classroom into a physical representation of the terrain typically thought to be seen during the Mesozoic Era. By the end of the month, your classroom’s transformation into your very own Jurassic Park should be complete!
The following lesson elements are to be focused on for the week. By the end of the week your learner(s) should:
- Know When and Where the dinosaurs lived (i.e. during the Mesozoic Era and in many places around the globe). They should also be familiar with the concept of a timeline.
- Be familiar with types of habitats - On land only (forests, jungles, plains etc.), since dinosaurs did not fly or live in the water (water- dwellers of that time were called “marine reptiles” and flyers were called “flying reptiles” not dinosaurs).
How will I teach this week?
For this week’s planning you should start by mapping out the classroom design to create your own Jurassic Park (don’t forget about creating a special reading place for your blue lessons too!). Throughout the week, plan Project Based Lessons that create the things you need for your room (i.e. plants, trees, mountains, volcanoes, lakes, rivers, etc.). Do not simply do a project to create a bunch of volcanoes, rather, do a project designed to teach one or more of your learning goals. Take the product of your lessons, which might be a volcano or a group of trees, and use them for your pre-planned room design. The work you put into this week will translate into less planning later in the month. A well-designed room will provide you with teaching tools for Discussion Based and Activity Based Lessons for the next three weeks. Do not forget to incorporate Number and Shape Opportunities into your Green Lessons throughout the month.
Which Learning Goals do I need to incorporate?
The following are learning goals that you should be aware of in every lesson you teach this week. Creatively incorporate them into your lessons and your child(ren) will not even realize they are learning! Below you will find the learning goal with a brief description of how to work it into your lesson.
Life Science
Children know how to observe and describe similarities and differences in the appearance and behavior of plants and animals:
This month you will be creating a variety of learning experiences designed to teach your students how to observe and describe the similarities and differences that existed in the flora and fauna of the Mesozoic Era. This learning goal is easy to include in almost every lesson you teach through the creation of “field guides” that can be used throughout the month. You can even address this learning goal in a brief discussion or you can plan an entire theme-based lesson to teach the concept.
Number Sense
Know that larger numbers represent more objects than smaller numbers:
This is not an exciting concept for any age so be prepared to deliver it in a “fancy” package. The teaching of this learning goal should be wrapped into lessons designed for more exciting theme-based projects and games. This concept requires repetition so try to work it into as many lessons as you can by having brief discussions about subjects related to the theme (I.e. “Are there more dinosaurs in our Jurassic Park than there are trees?”).
Use concrete objects to determine the answers to addition and subtraction problems (for two numbers that are each less than 10):
This is an advanced concept so make sure you have a plan for adjusting it slightly so that it is age-appropriate for younger children. Like the above learning goal, the concept of addition and subtraction requires repetition, so do your best to work in into as many lessons as possible throughout the month.
Numbers and Shapes
Recognition, Writing Numbers and Drawing Shapes
Providing learning opportunities for numbers and shapes is an essential component of teaching Green Lessons. Children should be practicing their number and shape recognition skills on a daily basis in a consistent manner (i.e. flashcards, counting during Circle Time, singing songs, etc.) and have the opportunity to write numbers and draw shapes several times a week. These skills need not always be taught through a formal lesson. Number writing, shape drawing and practicing numbers and shapes with flashcards are great activities for children once lessons have reached completion and students have entered choice time.
Numbers and shapes can also be integrated into practically every lesson taught simply by briefly calling children’s attention to, for example, the number of symbols on a map, or allowing them the opportunity to write a number or shape on their theme-related project.
I'm stuck. Suggestions please!
Week 1: GETTING STARTED
- Materials Needed: Soundscapes of the Dinosaurs CD
- Having trouble getting started? Play your Soundscapes of the Dinosaurs CD and crank the volume up to set the Jurassic atmosphere! You can draw attention to the sounds of the CD by asking your child what he/she hears with open-ended questions. This will help draw your child into the world of the dinosaurs allowing you to easily segue into your lesson of the day!
Week 1 Lesson Suggestion: HERBIVORE FOOD FIND (Discussion Based & Activity Based)
- This lesson is a fun and healthy way to eat like an herbivorous dinosaur! 5-10 minutes of prep work will allow your child to enjoy the “dino buffett” you have created! This lesson can also be turned into a 2-day activity to further extend the fun and learning experience!
PART 1: Before the start of class time, prepare your chosen fruits and vegetables by cutting them into various, basic geometric shapes (squares, rectangles, triangles, etc.) and place them into a few Ziplock storage bags. Place the lunch/deli meats in bags separate from your fruits and vegetables. Place the bags around your classroom area in easily accessible areas. Introduce your child to the concept of herbivores: animals and creatures that only consume plants for food. Allow your child the opportunity to examine a few pictures, toys, models or any other engaging factor that will enable them to easily see and discuss some of the features of herbivorous dinosaurs (flat teeth, mostly quadrupedal, defensive adaptations, herd living, etc.). A great way to draw attention to their characteristics and behaviors is through the use of open-ended questions!
PART 2: Now it is time to set your child loose on an herbivore food hunt! Allow your child a few minutes to roam around your classroom space, finding and eating some of the fruits and vegetables you have prepared but NONE of the lunch meat as herbivores ONLY consumed plant life! Count with your child how many of each food type he/she eats, as well as identify the shapes each is in. Once your child has eaten a few items, return to a quiet area and decide together which fruits and veggies each herbivore (and your child) would have liked the most!
* To add another day to the experience, and extend the learning process, save any leftover items for the next day. Prepare your classroom in much the same fashion, only now place some bags just out of your child’s reach (don’t forget to include their tip-toes!), or behind a heavy object he/she can’t move. Tell your child that he/she MUST find a certain # of items (3 triangles or 4 squares; your choice on the amount) in order to keep from going dino-hungry. Again, allow your child a chance to roam the area in search of food, only now they can only be given 1 minute to search! If there are any “competing dinosaurs” (siblings, friends), allow them to join in on the hunt! When time is up, yell “T-REX!!” and that the search is over. Explain to your child that though there was food for many dinosaurs, some were not tall enough, strong enough or fast enough to get to it before another dinosaur did, or before a predator scared them away.
Friday
David Krentz Creations: Dinosaur Animation and Drawing
What am I teaching?
 To start the month you will turn a portion of your home classroom into an art studio. Fill the shelves in your classroom with materials needed to be an artist, an animator, a sculptor and a painter (i.e. paint, brushes, crayons, pencils, paper, clay, popsicle sticks, empty paper towel rolls etc.) Display art materials as attractively as possible (i.e. pencils in cups, paper in trays, bulky art materials in baskets, etc). The more time and creativity you put into designing your art studio, the more involved in the art children will become. As you move through the month post examples of the types of artwork your child will be participating in (i.e. drawing, painting and sculpting) as well as the tools needed to complete it.
You will also be introducing your children to the artist, David Krentz as well as the music, “Soundscapes of the Dinosaurs.”
The following lesson elements are to be focused on for the week. By the end of the week your learner(s) should:
- Know who David Krentz is and what he does.
- Be starting to become familiar with speaking about art they have created including types of mediums used (i.e. pencil, crayon, paint, clay, etc.)
- Be familiar with the term animation and how it is done.
- Have created their own dinosaur animation.
**Side Note: Save all art work completed by children for the “art show” at the end of the month.**
How will I teach this week?
Begin week 1 with an introduction to the world of dinosaur art. Use the artist of the month, David Krentz, to do this. Give students a brief biography of the artist (DavidKrentz.com) and watch the video, “Krentz Presents Tyrannosaurus Rex.” While watching the video talk to children about what they are seeing, you may even want to incorporate journals into the watching of the video, encouraging your child to follow what David Krentz is doing. The rest of the week will be focused on dinosaur animation and drawing. By using tracing as a means to draw you can easily turn your children into mini animators! Keep in mind that flip books are a great way to teach animation and they are tons of fun to “watch” after the drawing is done.
The music of the month, “Soundscapes of the Dinosaurs,” can be added into virtually every lesson by playing it in the background while children are working. The “Songs That Teach” CD is the perfect answer to any unruly day. It has eleven songs that not only teach about dinosaurs but are fun to move to as well.
Lessons for week 1 should be primarily Project Based with a Discussion Based Lesson at the beginning of the week.
Which Learning Goals do I need to incorporate?
The following are learning goals that you should be aware of in every lesson you teach this week. Creatively incorporate them into your lessons and your child(ren) will not even realize they are learning! Below you will find the learning goal with a brief description of how to work it into your lesson.
Music
Children create movements that correspond to specific music:
This learning goal can be addressed through listening to the music, “Soundscapes of the Dinosaurs.” Allow children the opportunity to pretend they are the dinosaurs heard on the CD and let their imaginations run wild! This learning goal is a great “back up” to any lesson gone awry!
Visual Arts
Children discuss how and why they made a specific work of art:
This learning goal should be addressed each time students create something in the Red Room this month. After a day of artistry, gather the students onto the carpet with their creations of the day for a brief Discussion Circle. Go around the circle and allow children to explain what they have created and why they chose to make it the way they did (i.e. color, texture, height, etc.). This is not only a great way to end class, but will start to build confidence in your students’ art and speaking skills.
Discuss the various works of art (e.g., ceramics, paintings, sculpture) that artists create and the type of media used:
This learning goal can be addressed each time a new form of art is introduced (i.e. painting, sculpting, drawing, etc.). A small discussion should take place allowing children not only to hear about but also see the different tools needed to create different works of art. Tactile experiences woven into your discussion will cause the discussion to be fun as well as easily remembered!
Artist of the Month
David Krentz
Children will be learning about David Krentz, an animator, artist, and sculptor of dinosaurs. Children will be mimicking his work throughout the month as well as adding their own personal touches to the work they do. David Krentz’s artwork easily captures the imagination of any child and leaves them yearning for more!
Music of the Month
“Soundscapes of the Dinosaurs” by Douglas Irvine:
The music of the month can be worked into most lessons. Music is a great inspiration for projects and creates an inviting and stimulating learning environment. Use the music to enhance your lessons and be careful not to play it so much that children begin to tire of it.
Color Recognition & Primary vs. Secondary
Providing learning opportunities for colors is an essential component of teaching Red lessons:
Children should be practicing their color recognition skills on a daily basis and have the opportunity to blend colors several times a month. These skills need not always be taught through a formal lesson. Color blending activities and color recognition practice with flashcards are both great activities for children once lessons have reached completion and students have entered choice time. Colors can also be integrated into practically every lesson taught simply by briefly calling children’s attention to colors being used in an activity. When talking about colors with your child, try to refer to colors as being primary or secondary so that they start to pick up the concept through daily conversations as well as through the projects completed during lessons.
I'm stuck. Suggestions please!
Week 1: GETTING STARTED
- Materials Needed: None!
- Having trouble getting started? Why not try some “Dinosaur Stretches”!? Streeeeetch your arms and legs to look like Diplodocus! Draw your arms close and bend at your waist like a Tyrannosaurus on the hunt! Shuffle slooowly on all fours as a mighty Triceratops would! Have your child demonstrate a few dino-stretches of his/her own and allow him or her the chance to lead the fun!
Week 1 Lesson Extension/Back-Up Plan: DINOSAUR MASKS
- Materials Needed: Construction paper (various colors), glue, child-safe scissors, paint, textured materials, yarn, masking tape, hole punch; pictures of various dinosaurs, toys or other dino-related creatures (for reference)
- Using the materials listed, you can your child can create one or several different masks of your favorite dinosaurs! Once completed, these masks are a great addition to your imaginative play costumes!
PART 1: Allow your child a few minutes to look at various dinosaurs. Books, magazines, toys & videos are all great ways to give your child an opportunity to view them! Be sure to ask open ended questions about what he/she is seeing (“What color is this dinosaur? Could it be any other colors?”). Draw attention to the facial areas and features of the dinosaurs with a few comments or questions (“How many horns do you see on THIS dinosaur!? I wonder what they could be sued for...?”). Once your child has had a few minutes to look your examples over, it’s time to create!
PART 2: There is no right or wrong way to create your dino mask! It can be a simple eye mask with a few additions, or a full-face affair! This is an opportunity for your child to be creative, as well as an opportunity to continue building his/her fine motor and abstract thinking skills. Once your child has completed his/her mask, help your child get unleash their inner Jurassic beast by using a small piece of tape (about 2 inches in length) folded over the outer edge of your mask. An additional piece of tape can be used for extra strength if you feel it will be necessary. Hole punch through the tape, attach your string or yarn and get out of way because you now have a dinosaur on the loose!